Forecast Uber Stock Prices using MindsDB

I am a Full Stack Software Engineer with experience working on user-driven frontend applications and building end-to-end scalable backend services from scratch.
Specializing as a Web Application Developer, I am passionate to solve difficult problems at scale. I geek about meta programming all the time.
Some core competencies includes
- Angular
- Java
- Node
- Spring Framework
- Jenkins, AWS
- React
Introduction
When it comes to AutoML, one of the most remarkable open-source products is MindsDB. MindsDB enhances the existing databases and modifies their tables to function as AI Tables that can train robust Predictor models using the available data, without the need to learn how to code such models in Python, handle their dependencies, or maintain them at a later stage. With MindsDB, you can use simple SQL-like statements and obtain accurate predictions with just a few clicks.
In this tutorial, we will learn how to forecast the stock prices of Uber using MindsDB. The required dataset for this tutorial can be downloaded from here.
Importing Datasets as Tables in our Database
After you've downloaded the Dataset, save the CSV file in a folder Make sure you have MySQL installed on your system, and that it is active. Use MySQL Workbench to test the Database connections and make sure everything is working.

If the connection is successful, you can click on OK to save the connection. Then click on the connection and it should open the Localhost dashboard along with the query editor.

Now click on Create a new schema in the connected server, provide a name for the schema and then hit Apply, and then click on Finish.

After creating the database, select Schemas from the bottom left and then right-click on the schema you just created and select Table Data Import Wizard. A dialog box should appear for you to select the CSV file and click Next. Now the table data import is complete and we are ready to manipulate the data in our table.

Let us run a sample SELECT query to see whether we have all of our data in the table.
 show databases;

 use MindsDb;

 select * from uber
This should return a list of rows from the uber table in the MindsDb database. We are now ready with the database and the table to perform further operations.
Connecting the Database to MindsDB Cloud
Login to your existing MindsDB Cloud account or signup for a new account.

Once you sign up or log in, the MindsDB Cloud Editor will appear. In the top panel, you can write a question, view the results in the bottom panel, and access several training hub resources in the right panel to facilitate the process for new users.

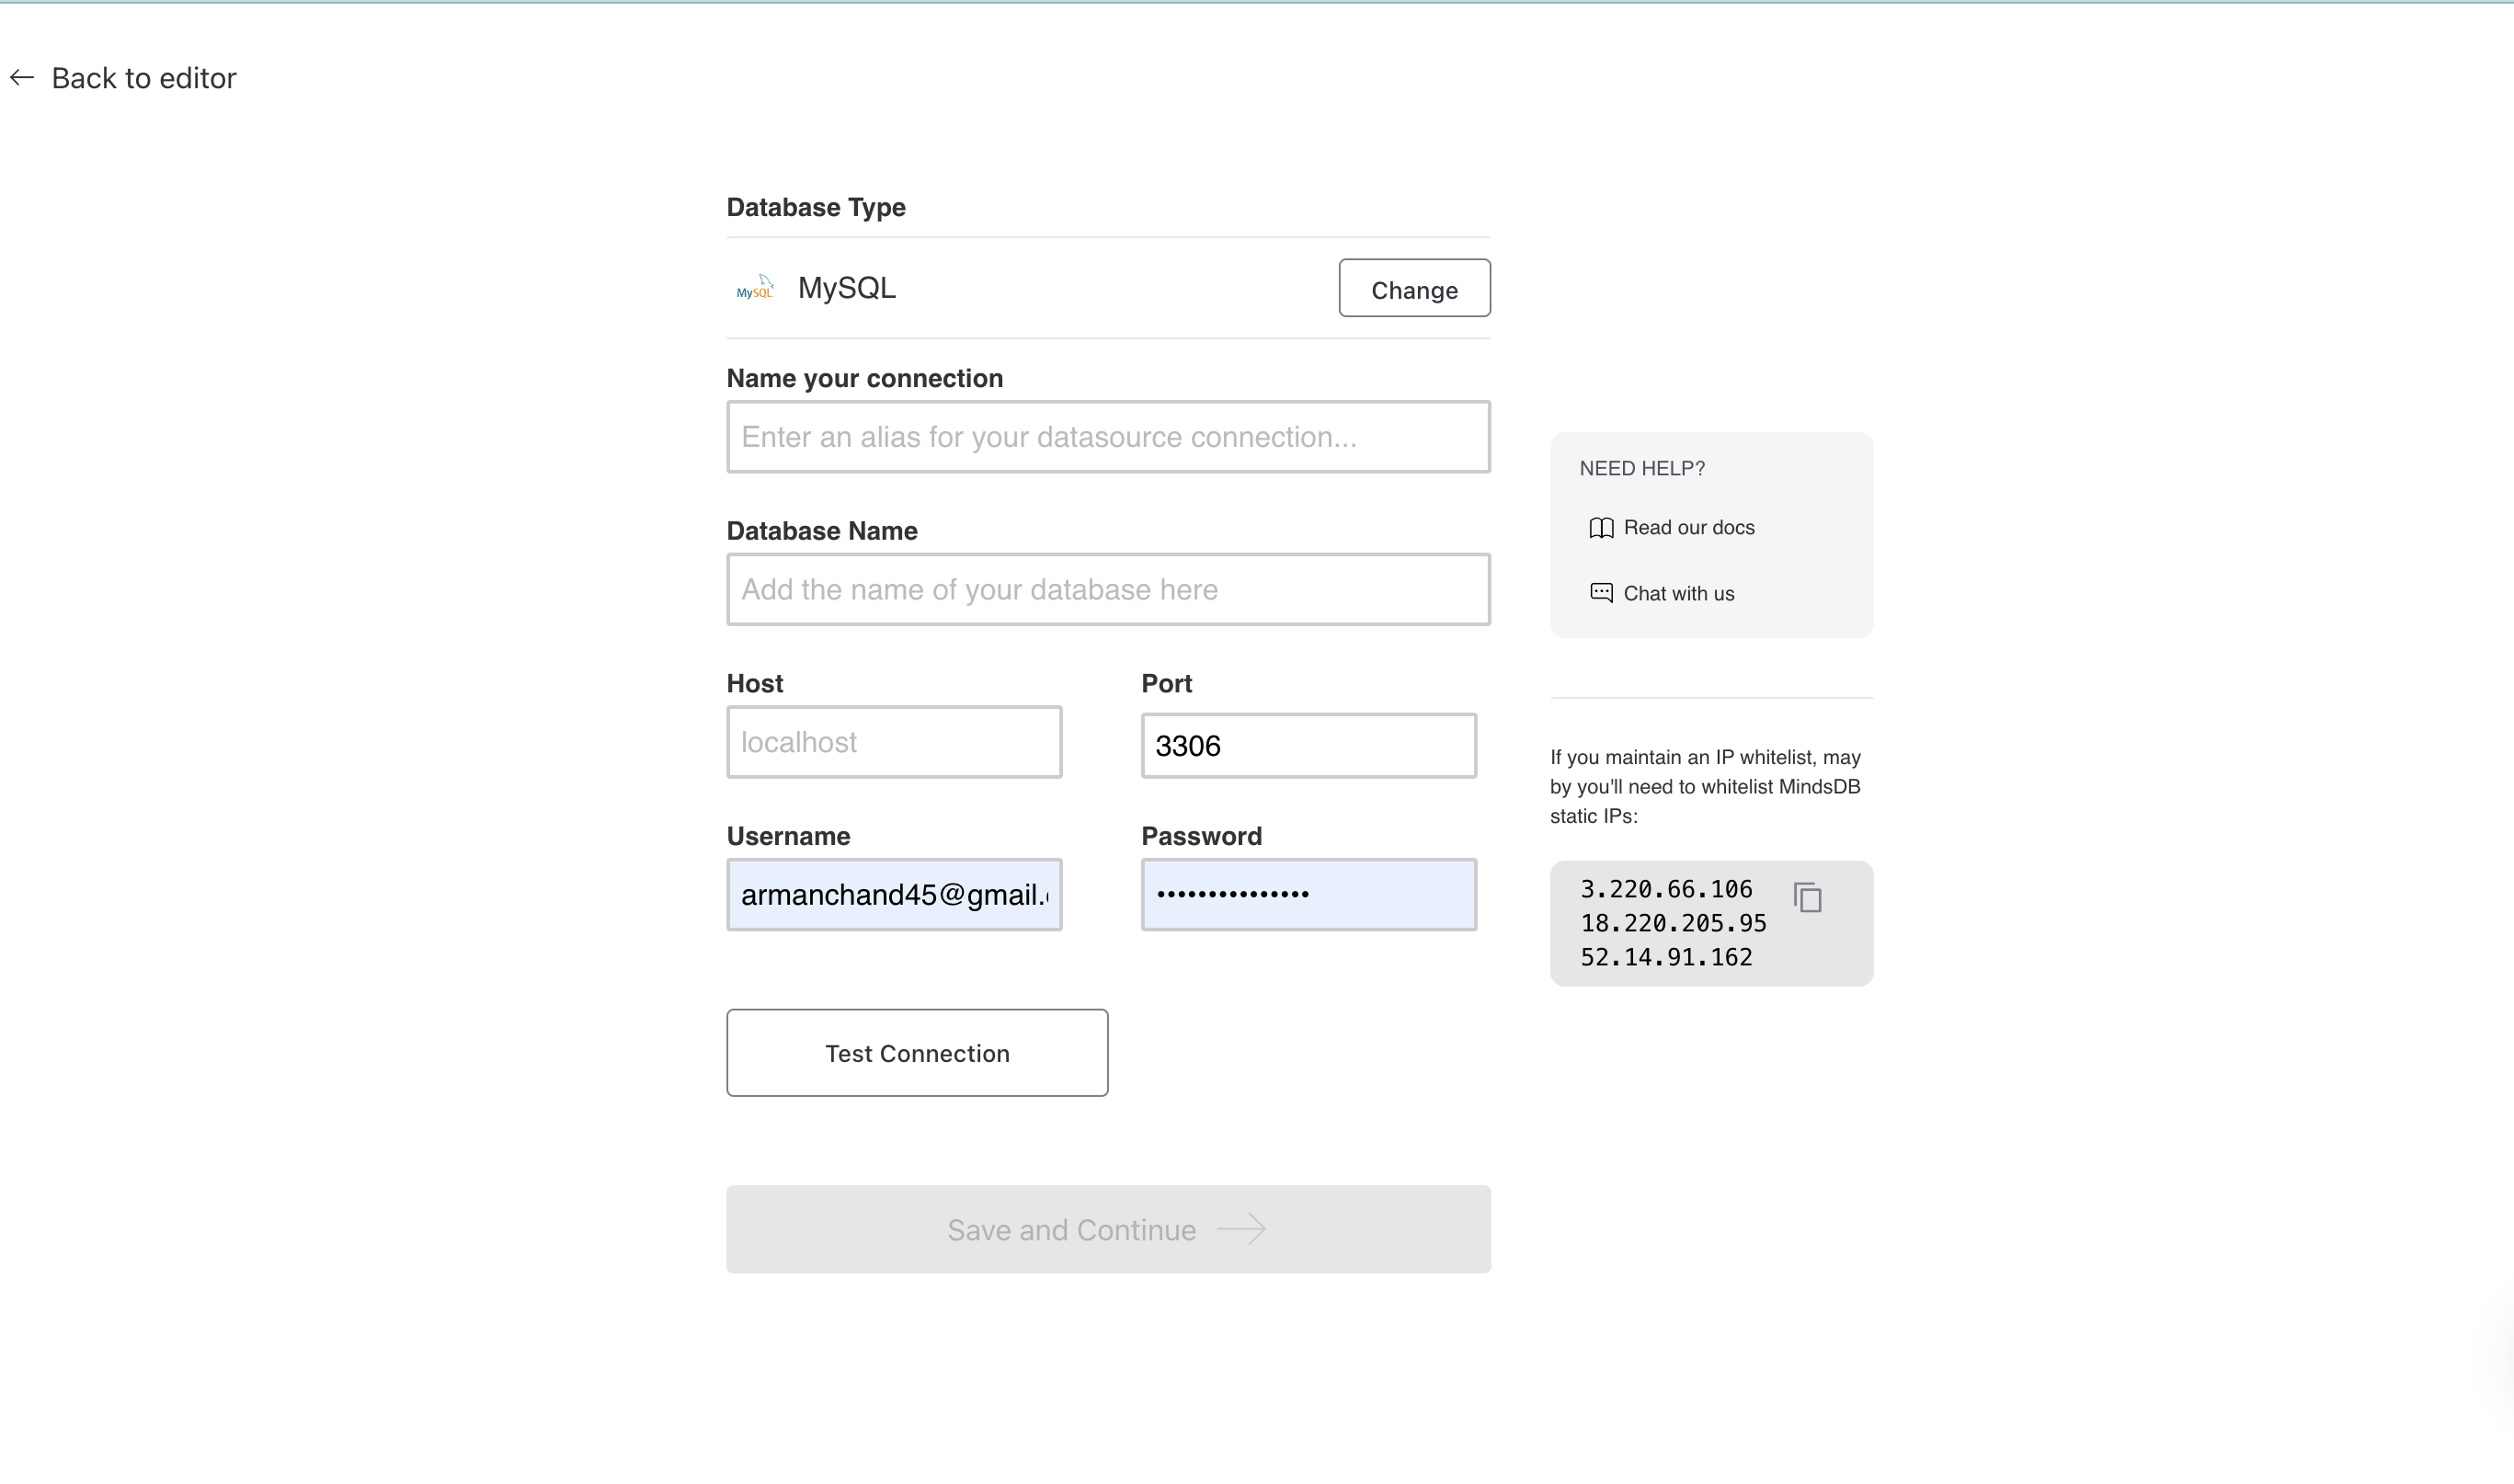
Click on Add Data from the highest right and on consequent screen that seems, select Databases from left panel and so click on Mysql database.

we need to provide certain parameters to establish a connection to our local database. In order to that, we need to expose localhost:3306 to the internet so that we can establish a tcp/ip connection to interact with it
We have to now use ngrok to tunnel our localhost to the internet. This command should do the job for you.
ngrok tcp 3306
Make sure you signup for a ngrok account and connect with your account using the auth token you received after signing up so that you are not time-limited for your tunnelling. You can do the following using this command.
ngrok config add-authtoken YourAuthTokenHereWe can now fill in the parameters to connect to the database and then hit the test connection button.

Now let's run a simple SELECT query now to make sure that MindsDB can now access the data in the database.
select * from MindsDBUber.uber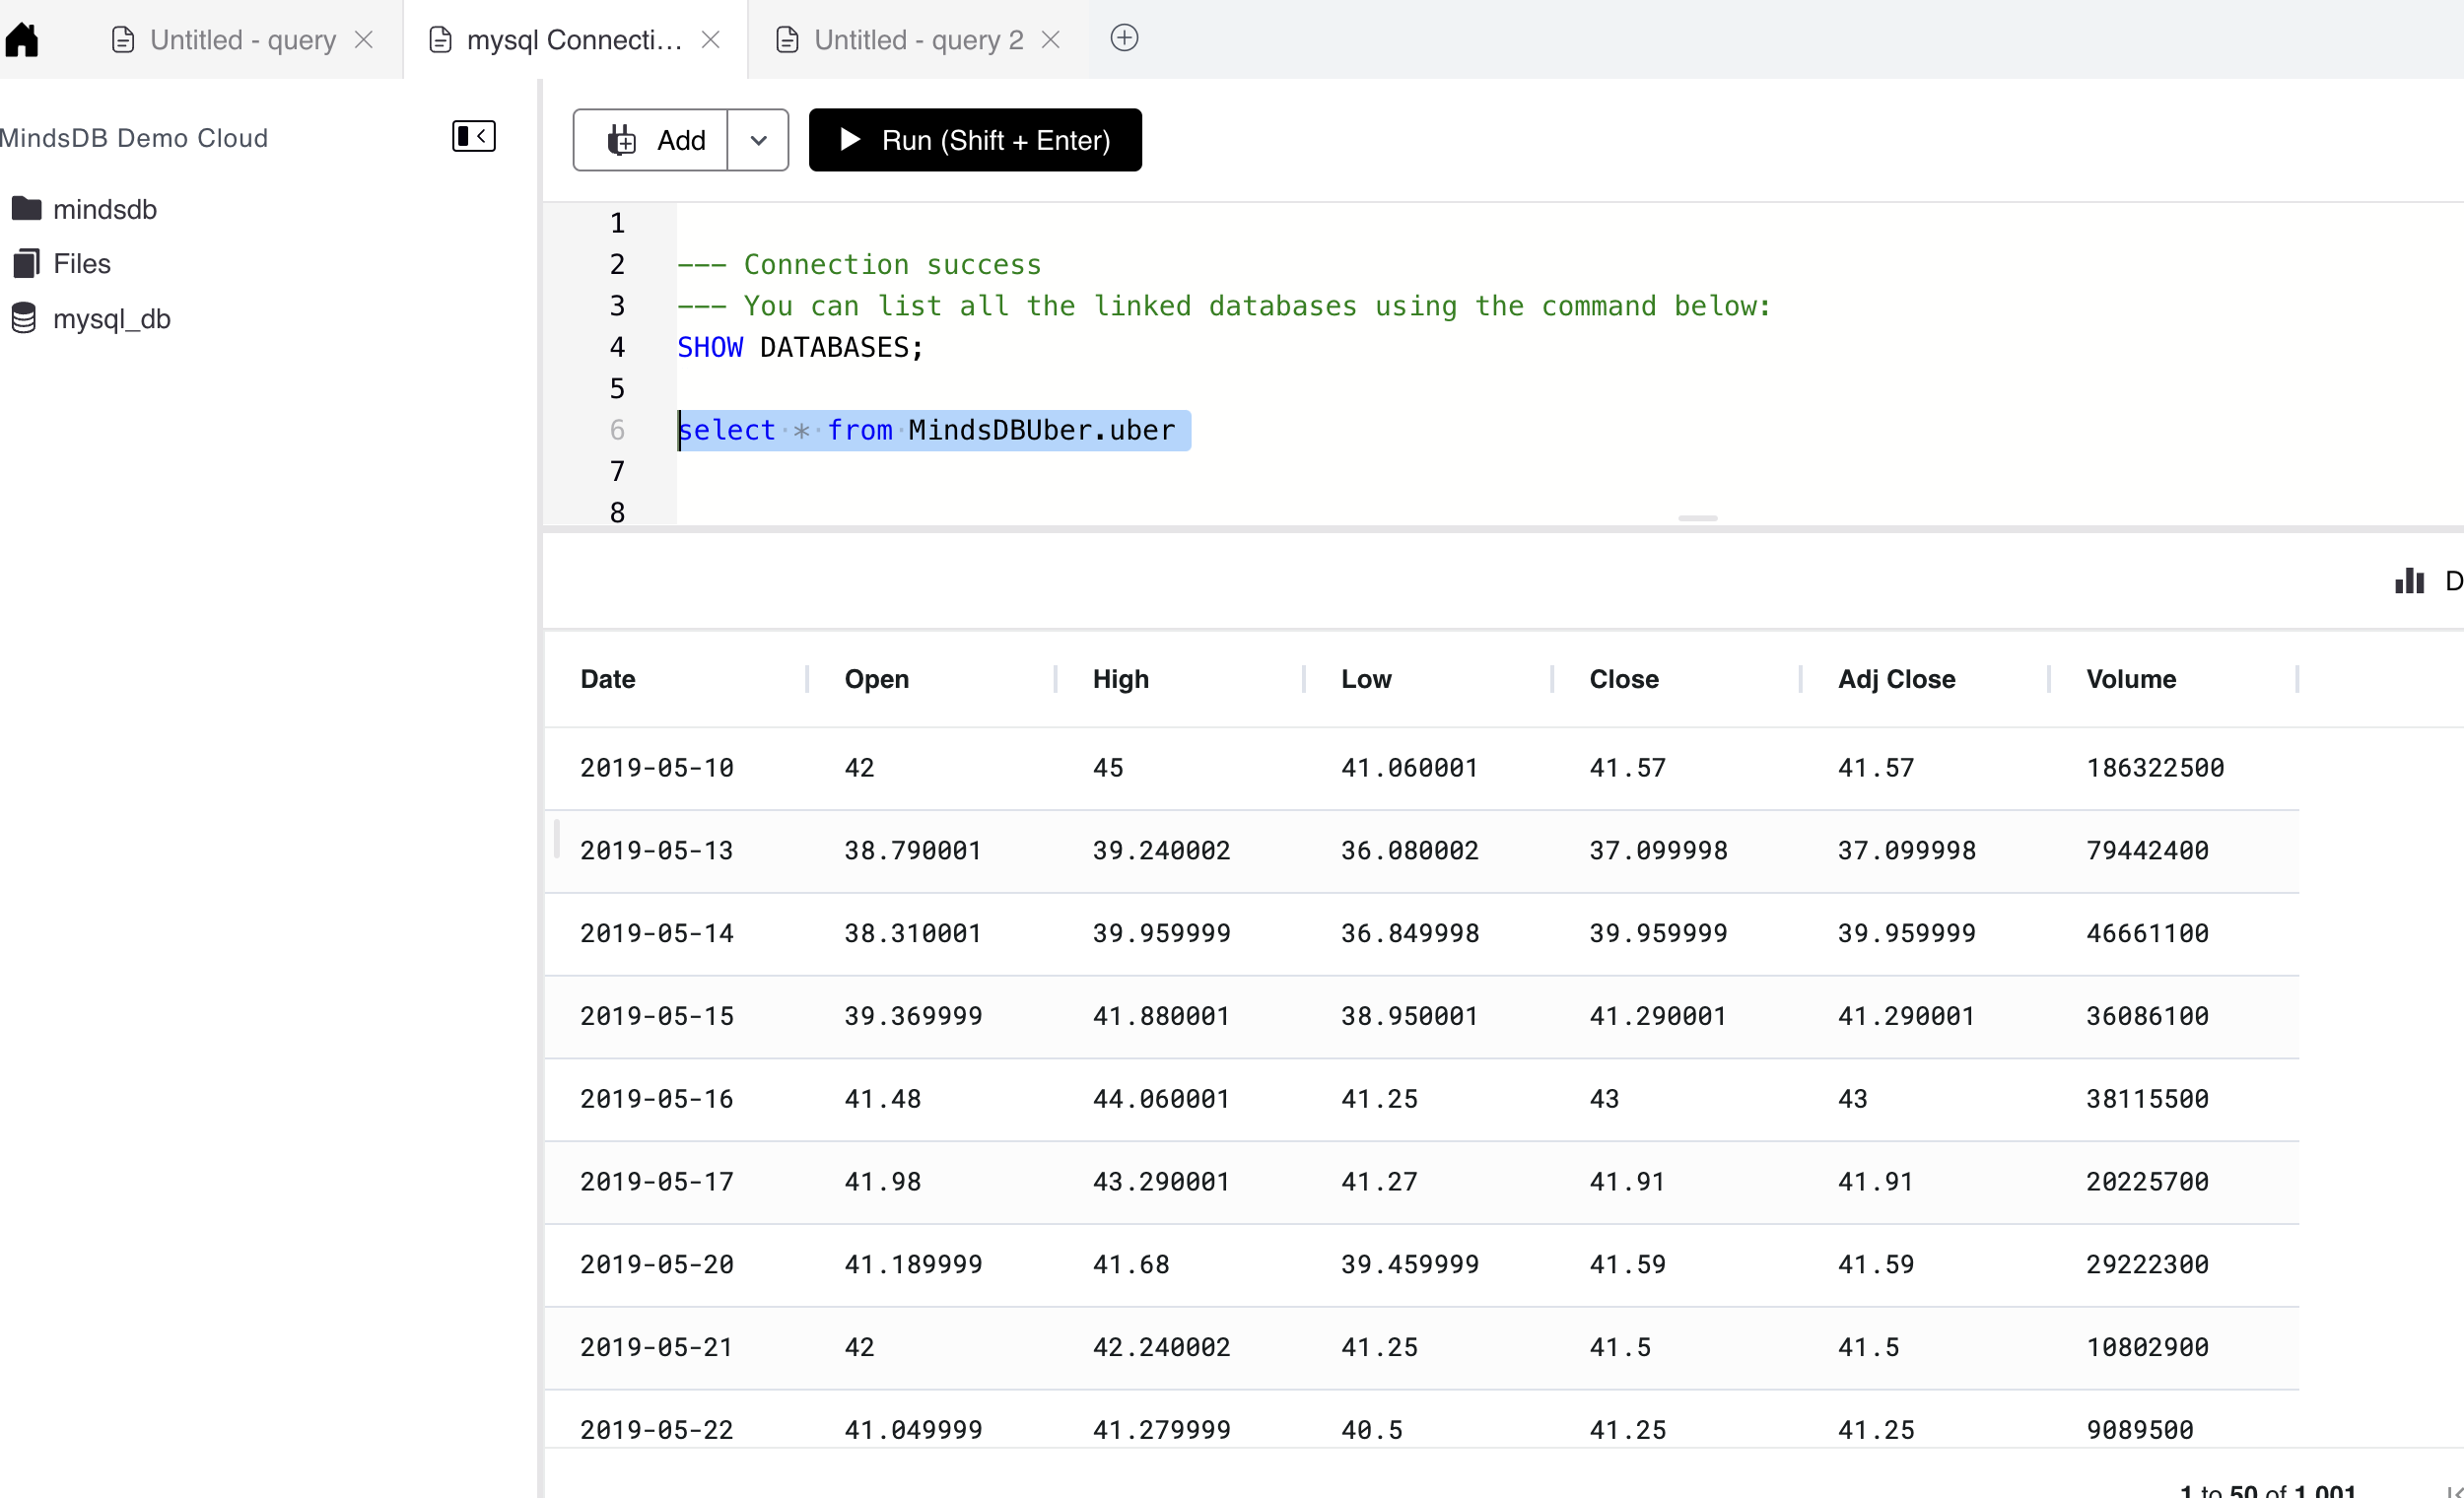
Creating a Predictor Model
To create a Predictor model with MindsDB, all you need to do is execute a simple SQL query. Let's explore how straightforward it is to create this model.
To create and train a new model using our available dataset, we can use MindsDB's CREATE PREDICTOR function. The query is provided below for your convenience.
 CREATE PREDICTOR mindsdb.uber_predictor
 FROM MindsDBUber
 (SELECT * FROM uber)
 PREDICT Close
 ORDER BY Date
 WINDOW 120
 HORIZON 60;
The model can take some time to be ready. Meanwhile, we can check its status using the command below.
 SELECT status
 FROM mindsdb.predictors
 WHERE name = 'uber_predictor';
If the status is
complete, then the model is ready. However, if the status isgeneratingortraining, then wait for a while until you get the status ascomplete.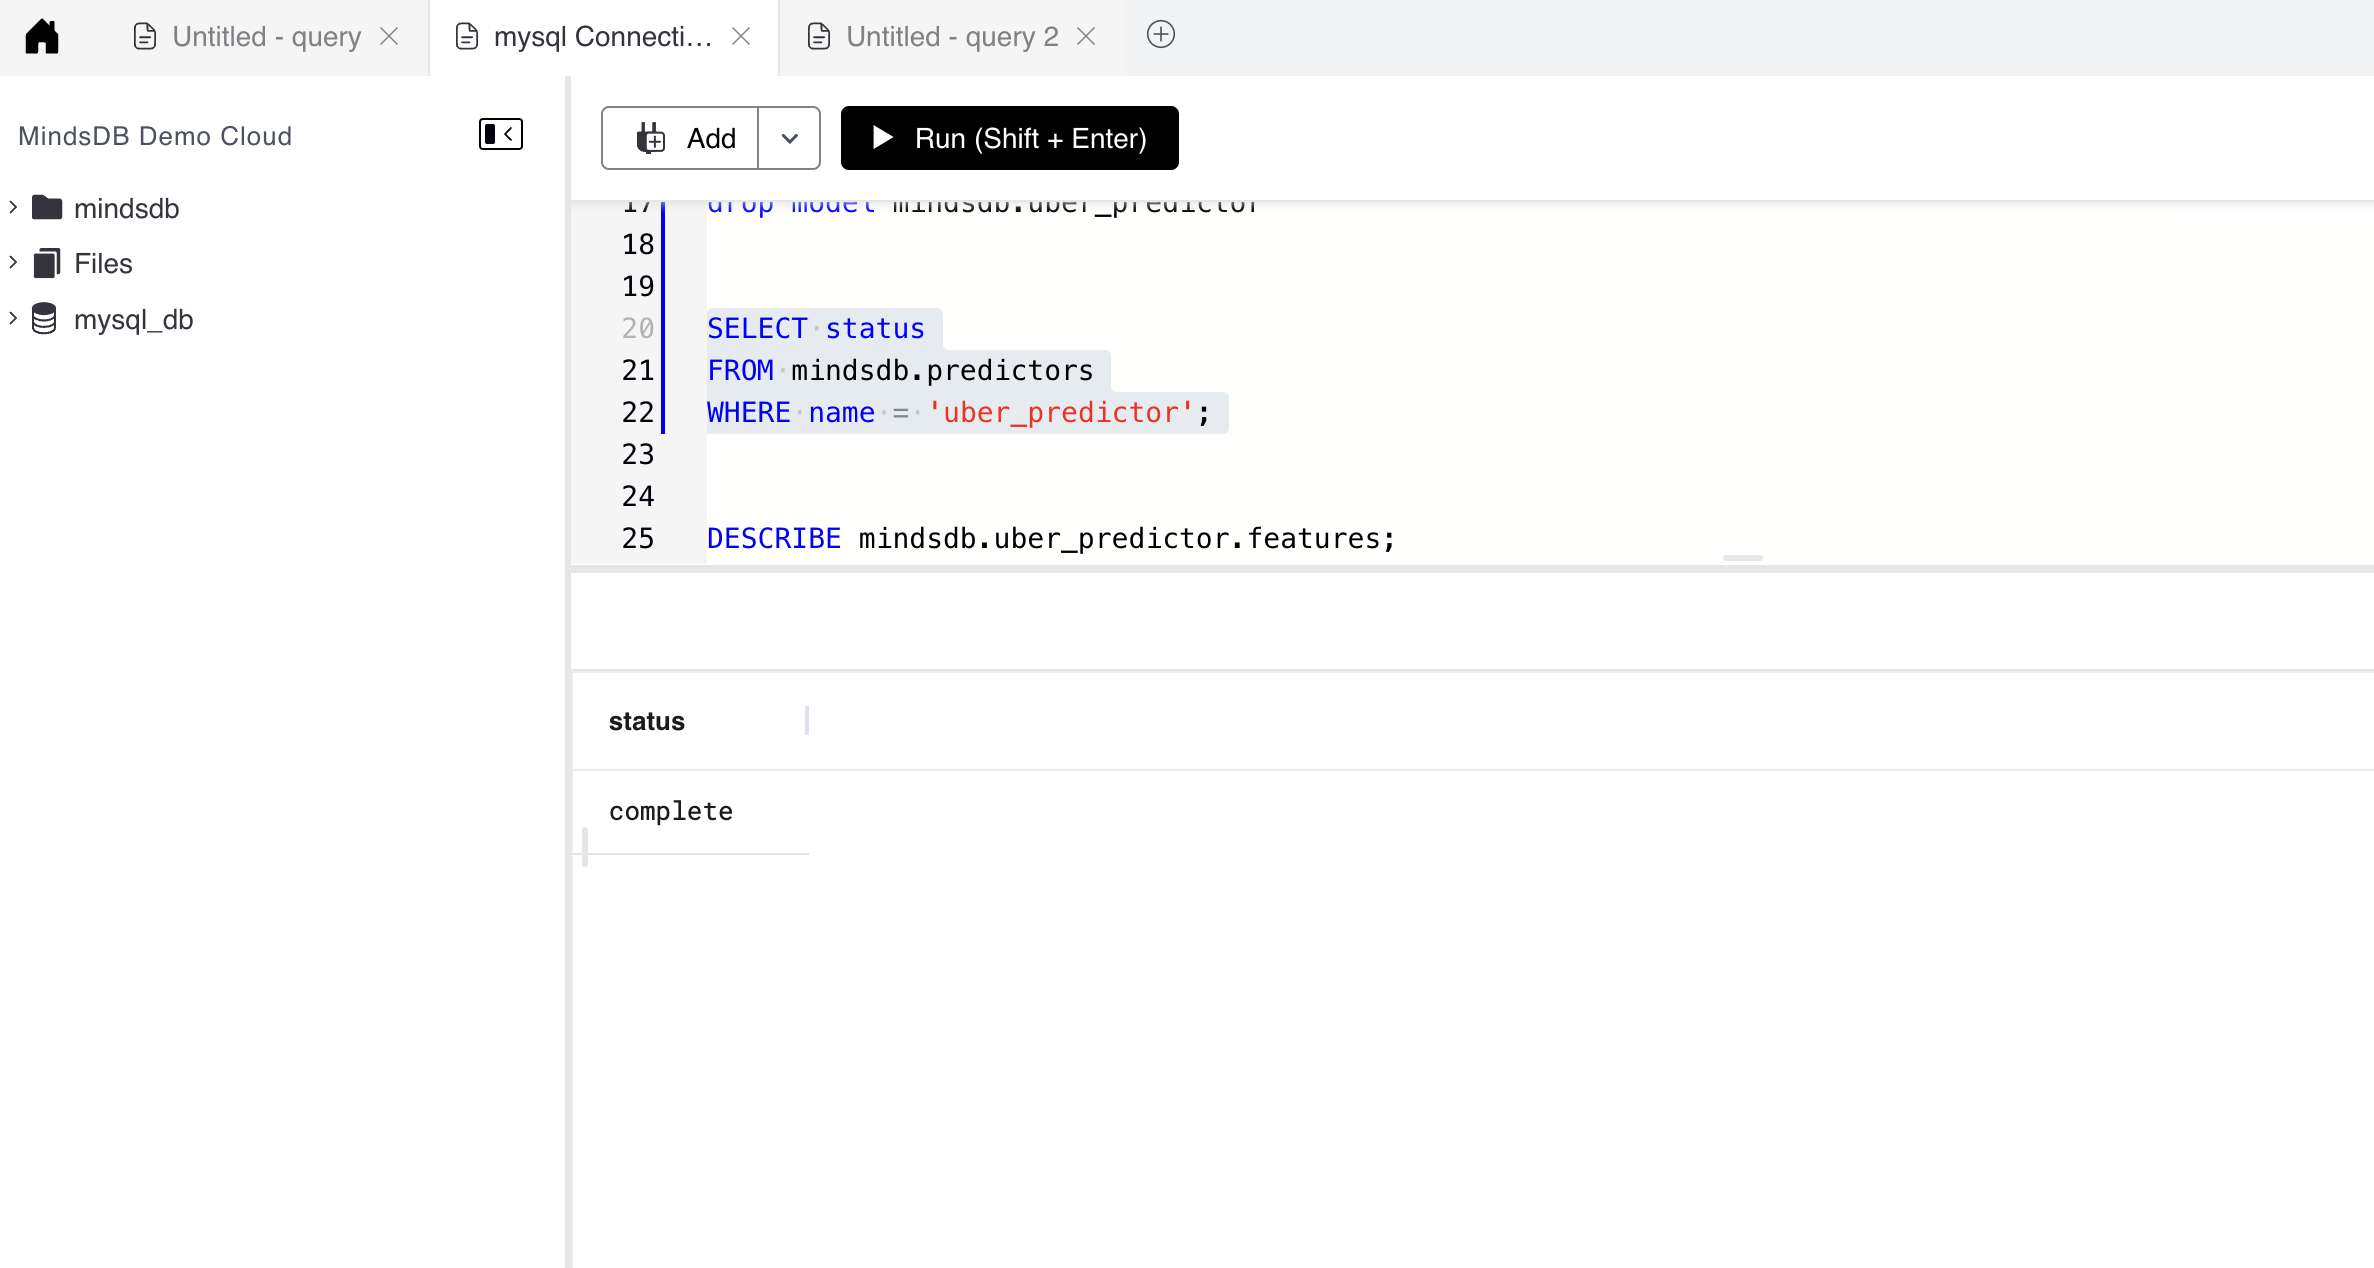
Understanding the Predictor Model
As the Predictor model is now ready, let us first understand what lies under the hood. So, MindsDB provides us with three ways to describe our model to retrieve further insights.
By Features
By Model
By Model Ensemble
By Features
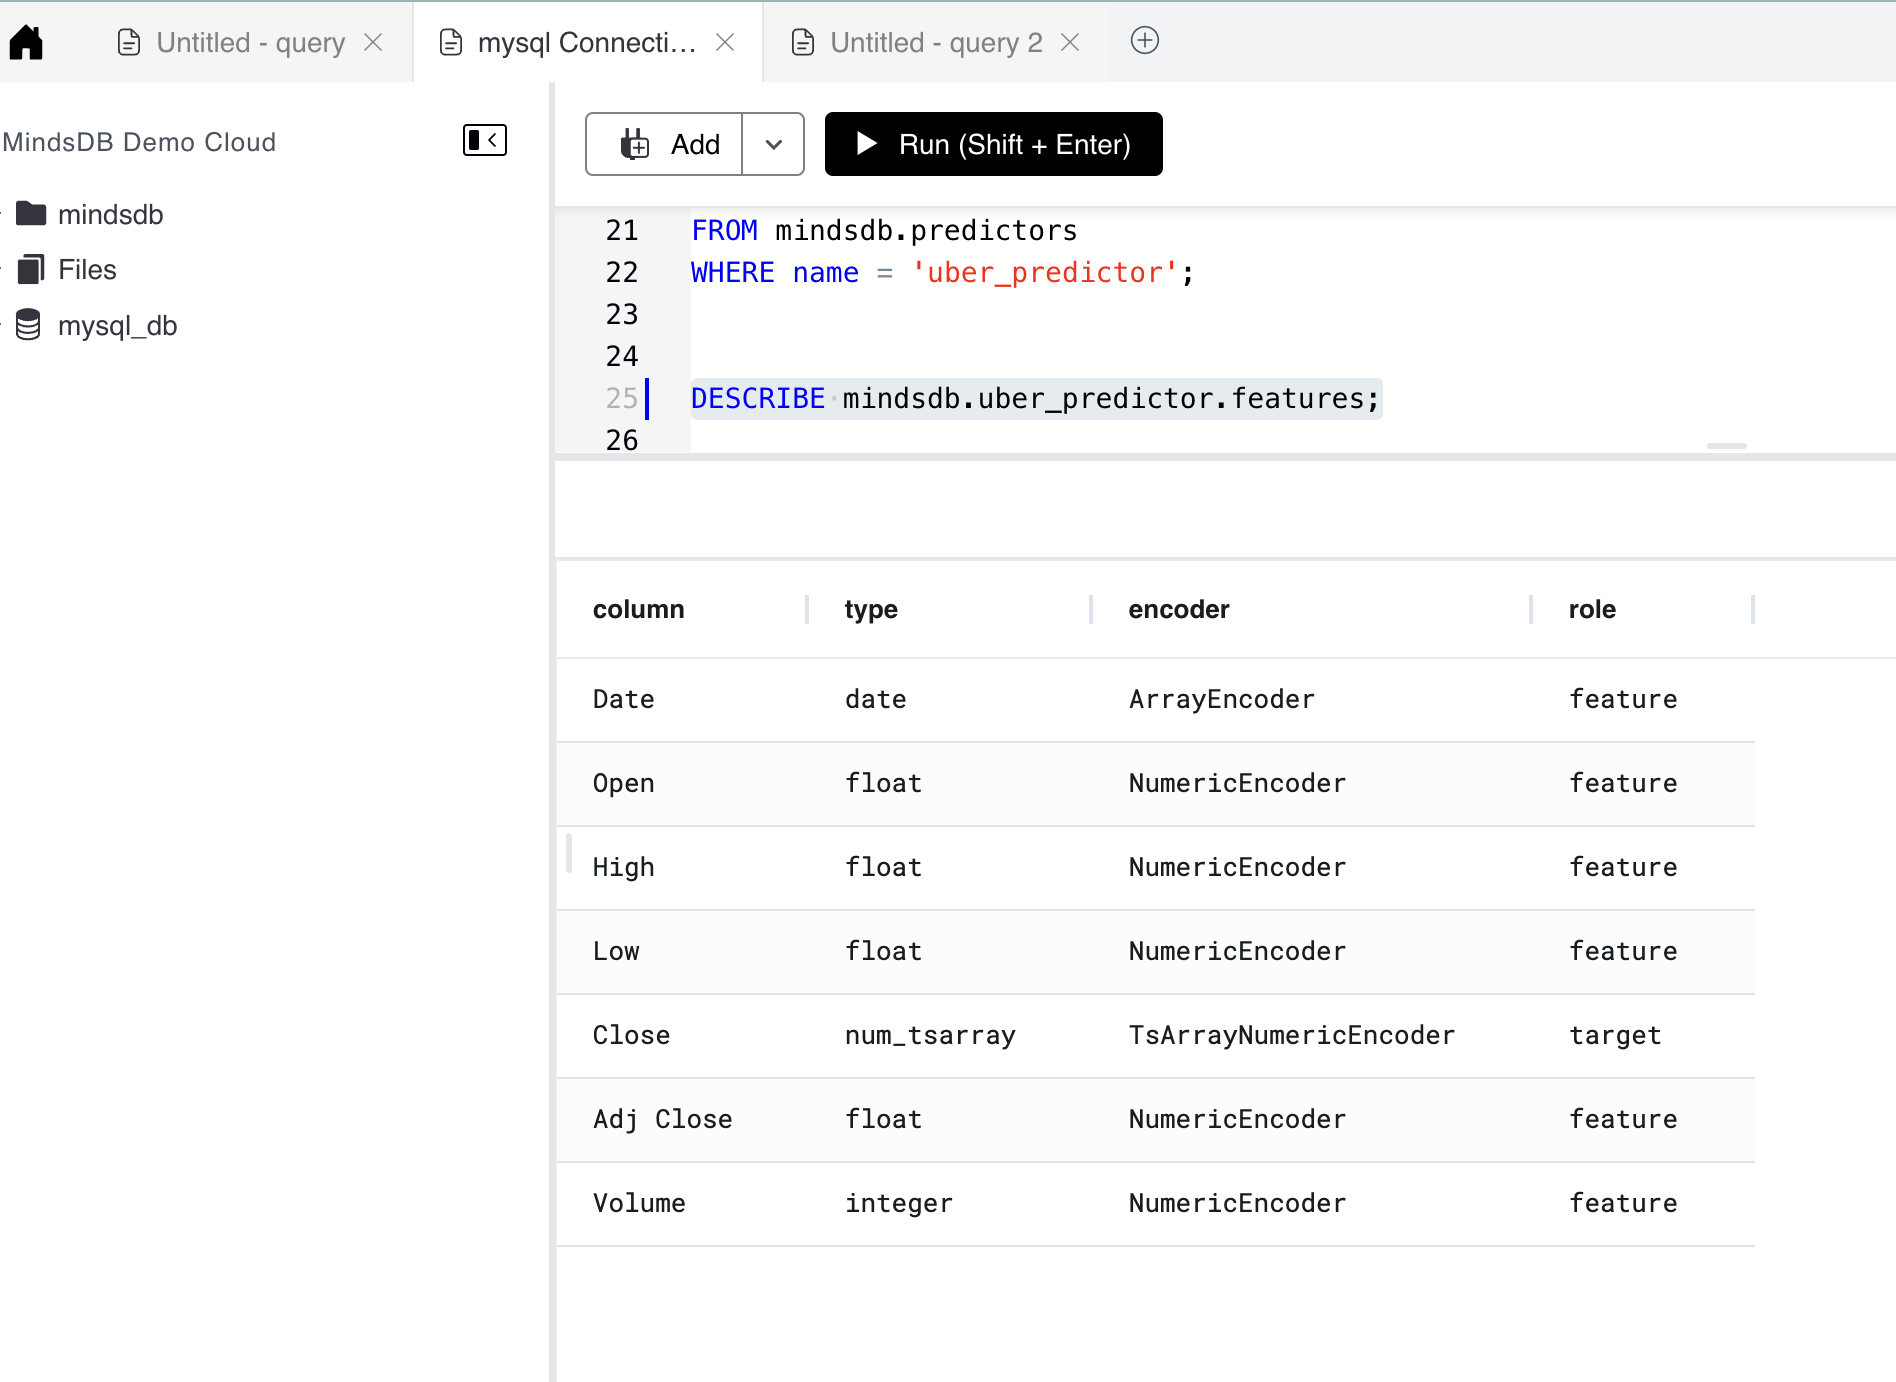
If you're interested to find out the roles that each of the columns serve for the model or the encoders used on them, then you can try to describe the predictor based on it feature.
DESCRIBE mindsdb.uber_predictor.features;
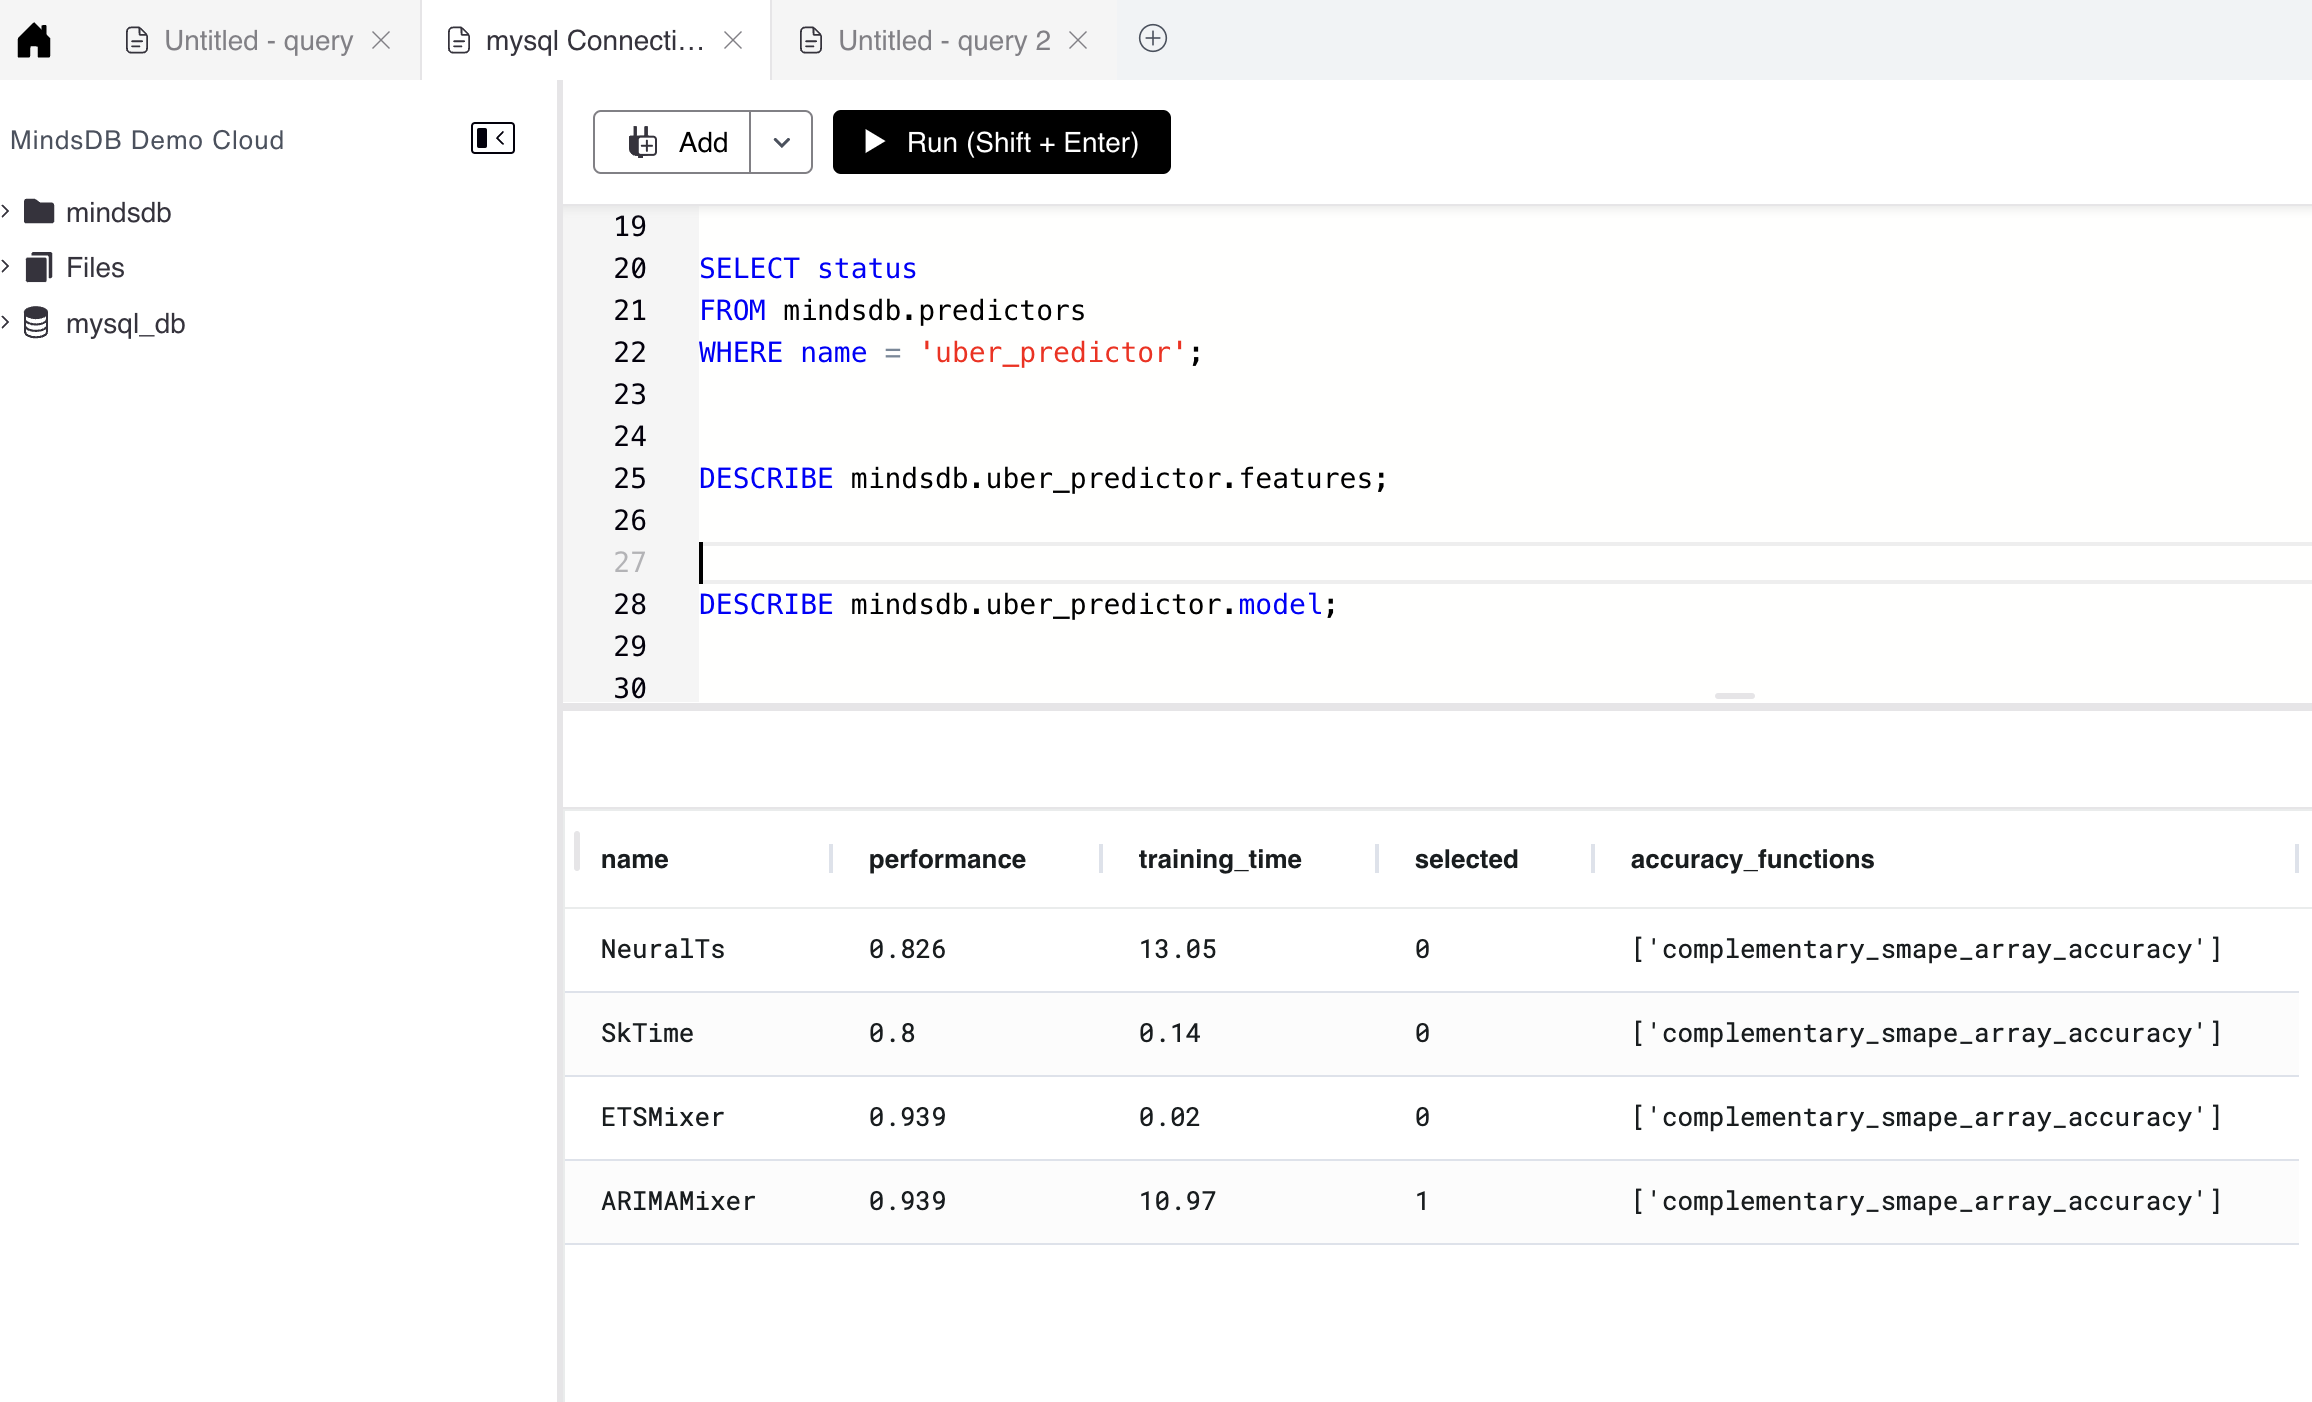
By Model
You can choose to describe it by model if you want to figure out the underlying candidate models that were used during the training along with the one that was finally selected for the Predictor. The selected candidate will have the value 1 in its selected column.
DESCRIBE mindsdb.uber_predictor.model;
By Model Ensemble
If you're interested to further deep dive and find out how the candidate model was selected, then you can try describing the predictor with ensemble.
DESCRIBE mindsdb.uber_predictor.ensemble;

We have now completed understanding the model we just trained. Time to start forecasting things now!
Forecasting Target Values
As usual, MindsDB also offers simple SQL statements to predict or forecast values from the model. Let's explore how we can forecast values.
Before we proceed, let's consider the basic scenario here. We have a dataset that lists the closing stock values of Uber over a period of time. Using this predictor model, we will attempt to predict the closing value after the last record available in the dataset. We can achieve this by using the keyword LATEST for the current dates.
The query will be a straightforward SELECT statement, where we will join the predictor model with the data table and retrieve the forecasts.
SELECT T.Date as date,
       T.Close as Forecast,
       Close_explain
FROM mindsdb.uber_predictor as T
JOIN MindsDBUber.uber as P
WHERE P.Date > LATEST
LIMIT 60;

Conclusion
We have now reached the end of this tutorial, where we summarized all the tasks we performed above as a list below:
Created a MindsDB Cloud Account
Imported a dataset into MindsDB Cloud
Created and trained a Predictor Model for Timeseries Forecast
Gained insights about the model using DESCRIBE
Forecasted the Uber Stock Prices for a future date
Now, it's time for you to create your own models and try forecasting some interesting values. If you need some suggestions, then you could try forecasting the Bitcoin Value, Ethereum Value, Gold Price, etc. Be creative, train something unique, and share it with the community.
Lastly, before you close this page, don't forget to give a LIKE if you found this tutorial helpful, and also let us know if you have any feedback. You can also suggest specific topics you wish to learn about MindsDB, and we will try our best to cover them in our future tutorials.


